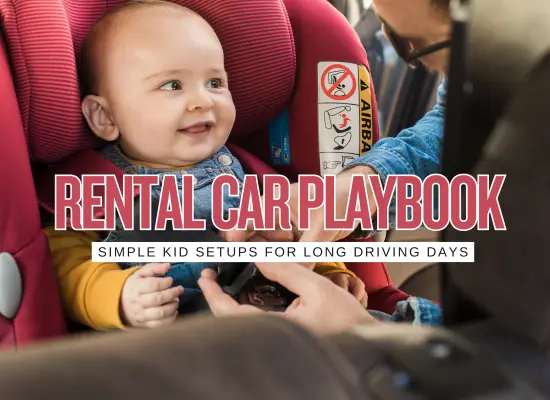
Renting a car with small kids is usually less about horsepower and more about where the snack bag lives, how fast you can reach wipes and whether the car seat fits without contortions in the parking garage. A little planning on the rental side plus a simple in-car layout can turn a long driving trip from “everyone stuffed in with bags at their feet” into something that feels organized and calmer. Think in lanes: car seats and safety first, then snack and activity zones, then a trunk setup that means you only unload what you actually need at each stop.
Below is a general, family focused overview. It is not car seat installation advice or legal guidance. Always follow your car seat manual, the vehicle manual and local laws, and get hands-on help from a certified technician if you have any doubts about your setup.
Before you pick a car, picture your kids buckled, where the food and toys will live and how you will reach the suitcases. The model you choose matters less than the layout you give it.
These are the patterns that cause trouble and the simple swaps that usually fix them for road heavy family trips.
Car seat decisions come first. The safest seat is the one that fits your child, fits the vehicle and is installed and used according to its instructions. Use your own judgment, your seat manual and local rules as your main guides, not a stranger at the counter.
- Check how many seats and boosters you will have and whether you need three seats in one row.
- Verify that your chosen class usually has enough rear seat width and trunk depth for your layout.
- If in doubt, step back one size up rather than trying to make a very small car work.
- Using your own car seats means you already know how to adjust harnesses and buckles.
- Travel carts, foldable strollers and backpack straps can help you move seats through the airport.
- If you do rent seats, inspect them, read the instructions and adjust them yourself rather than assuming they are pre set correctly.
- Plan where rear facing seats will go, where older kids will sit and which seat gives front passengers enough legroom.
- Consider putting the child who needs the most hands on help behind the passenger seat so an adult can turn and help at stops.
- Keep heavy bags off the parcel shelf and away from the top of rear seats to avoid loose projectiles.
Car seat instructions and vehicle manuals are the final word on how to install and use your specific seats. If you are unsure, schedule a check with a qualified technician before a big trip.
Long drives usually fall apart because someone is thirsty, hungry or bored and nobody can find the right bag. A simple row by row layout keeps food and activities reachable but contained.
- Keep a small insulated bag or lunchbox in the front seat area with pre portioned snacks.
- Use containers that can be passed back easily and closed again between bites.
- Store napkins, wipes and a small trash bag where the front passenger can grab them quickly.
- Use a soft sided caddy or seat back organizer for each row of kids.
- Limit each child to a small set of snacks and one drink in spill resistant bottles.
- Rotate one fresh item each fuel stop so the variety is slow and steady, not all at once.
- Think in kits. One drawing kit, one small figure kit, one simple game kit rather than a bag of random toys.
- Keep screen devices on a separate charger plan so they are a tool, not the only option.
- Hide one or two tiny surprise items in the glove box for first sign of big boredom.
This helper gives a rough idea of how many stops to plan for. It does not replace road safety advice. Always stop sooner if anyone is uncomfortable or you need a break.
Think of this as a planning floor, not a ceiling. Real life needs, traffic and weather should always guide your actual stop pattern.
The goal is simple. When you open the trunk at a hotel or gas station, you either grab one bin or you do not touch anything at all. No full unload in the rain while kids wait in their seats.
- Pack a shallow bin or duffel closest to the trunk opening.
- Inside put one change of clothes per child, basic toiletries, pajamas and swimsuits for night one.
- Add a small pouch with chargers, a compact first aid kit and any must have comfort items that should never be checked at a hotel desk by accident.
- Stand suitcases or larger bags behind the quick access bin or upright along the back seats.
- Group bags by room or by person so you can unload only what you need for each stop.
- If you have a roof box, use it for bulky but light items such as extra bedding or jackets, not for items you need at every overnight.
- Store strollers, folding wagons or sports equipment either at the very back or in a rooftop carrier if weight limits allow.
- Use a separate bin for shoes or boots so you do not have to shake dirt and sand out of every suitcase.
- Keep heavy loose items low and secured so they cannot slide forward suddenly.
Use this as a template and adjust for your own luggage and hobbies.
| Trunk zone | What lives here | When you touch it |
|---|---|---|
| Front edge, center | Quick access bin with first night clothes, small toiletry kit, chargers, swimsuits. | Every overnight stop. |
| Front edge, side | Small cooler or insulated bag for hotel fridges and cold snacks. | Fuel stops and hotel check in. |
| Middle row | Main suitcases or duffels, grouped by family member or room. | Only at longer stays or full unpack nights. |
| Against back seats | Bin of shoes and outerwear, folded stroller or folding wagon. | Weather changes, day trips from the base hotel. |
The front seats keep the whole operation running. Use door pockets and the console so you are not digging through backpacks for important items at tolls, borders or rental returns.
- Keep rental contract, insurance papers and parking passes in a flat sleeve in the glove box or front door.
- Use a carabiner or lanyard for keys so they move from ignition to one predictable hook or pocket.
- Take a quick photo of license plate and dashboard before you leave the lot for easier hotel parking check ins.
- Set up a simple rule, such as one main navigation phone on a mount and one backup device in the console.
- Run a small multi port charger so you are not fighting over a single plug.
- Download offline maps in case cell coverage drops on rural stretches.
- Keep your own water bottle, sunglasses and a light snack within reach so adults are not running on fumes.
- Use a small notepad or notes app to log fuel stops, hotel room numbers and any car seat re checks you do on the road.
- Talk openly with your driving partner about swap times so nobody white knuckles for too long in one stretch.
Screenshot or print this before you leave. Tackle each block once, then stop tinkering and enjoy the drive.
- Seats matched to each child and checked against weight and height limits.
- Installed according to both seat and vehicle manuals, harness snug and chest clips at armpit level where applicable.
- Loose heavy items placed low or secured, no bags sitting loose on rear shelf.
- One small snack caddy per row, with wipes and trash bag ready.
- Water bottles filled and placed in holders, not rolling around on the floor.
- Activity kits packed and screens charged with headphones or volume rules agreed on.
- Quick access overnight bin at the very front of the trunk.
- Main luggage grouped by room or person and placed behind.
- Stroller, sports gear and shoe bin secured and easy to reach only when needed.
- Rental paperwork and keys organized, license plate photo saved.
- Navigation set, offline maps downloaded and charger plan ready.
- Rough stop schedule agreed, with freedom to add more breaks if needed.
A rental car will never feel perfectly controlled with small kids, but a simple three zone plan makes the chaos more predictable. When you decide seat strategy before pickup, carve out real snack and activity zones and treat the trunk like a two layer tool instead of a storage pile, long drives turn into a series of small, doable segments rather than one long blur that everyone is eager to forget.